Let me share with you my favorite Crispy Chicken Spring Rolls Recipe — these golden, crunchy bites are packed with juicy ground chicken, shiitake mushrooms, and fresh veggies. They’re perfect as a snack or appetizer you’ll find yourself craving again and again!

Jump to:
Why You'll Love This Recipe
I honestly can’t get enough of making these spring rolls when friends come over. The combination of that crispy shell and the flavorful filling always disappears too fast, and the dipping sauce? Simply addictive.
- Perfectly Crispy: Thin flour-based wrappers fry up to that irresistible golden crunch.
- Flavorful Filling: Ground chicken mixes beautifully with shiitake mushrooms and fresh herbs.
- Easy Make-Ahead: Prep the filling in advance to save time on busy days.
- Flexible Cooking: Fry for ultimate crispiness or air fry for a lighter option.
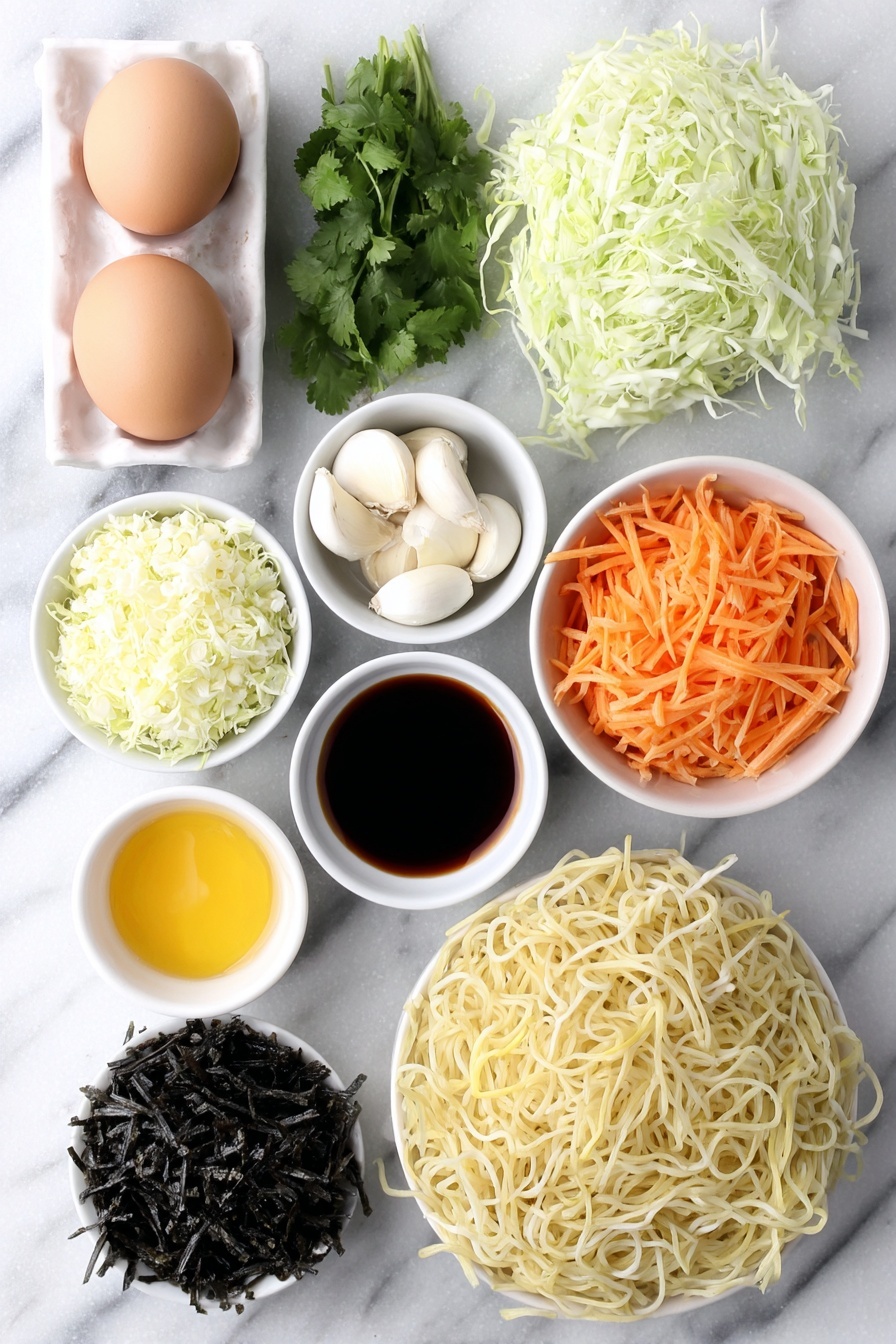
Ingredients & Why They Work
This recipe uses simple Asian pantry staples mixed with fresh produce to deliver vibrant, layered flavors. When shopping, look for fresh shiitake mushrooms and thin, square flour-based spring roll wrappers (you'll want lumpia wrappers rather than rice paper for the best texture).
- Avocado oil: Neutral flavor and high smoke point make it perfect for cooking the filling.
- Toasted sesame oil: Adds a wonderful nutty aroma and depth to the filling.
- Garlic: Fresh, minced for that punch of flavor.
- Shallot: Mildly sweet and aromatic, elevates the savory notes.
- Green onions: Thinly sliced to bring freshness and color.
- Shiitake mushrooms: Finely chopped for meaty texture and umami richness.
- Cabbage: Finely shredded for crunch and freshness inside the rolls.
- Carrot: Grated for subtle sweetness and vibrant color.
- Cilantro: Chopped to add a bright, herbal lift.
- Ground chicken: Lean protein that soaks up all the seasonings beautifully.
- Oyster sauce: Adds a savory, slightly sweet boost to the filling.
- Fine sea salt: Essential for seasoning and balancing flavors.
- Thin rice vermicelli noodles: Soft noodles to give the filling body and texture.
- Egg: Whisked for an egg wash to seal the spring rolls perfectly.
- Square flour-based spring roll wrappers: Crucial for that crispy, airy outer shell (avoid round rice paper wrappers).
- Basil or Thai basil leaves (optional): Adds a fragrant herbal note if you like a little extra freshness.
- Peanut oil: Ideal frying oil with a high smoke point and subtle flavor.
- Honey, Chinese mustard, Gochujang, rice wine vinegar: Key ingredients in the sweet, tangy, and spicy dipping sauce that elevates the whole snack.
Make It Your Way
One of the best things about this Crispy Chicken Spring Rolls Recipe is how adaptable it is! Feel free to tweak the filling or cooking method to suit your preferences or pantry staples—after all, homemade spring rolls are all about your personal touch and flavor.
- Vegetarian Variation: Swap the ground chicken for crumbled tofu or finely chopped cooked tempeh, and double up on the shiitake mushrooms for an umami-packed, vegetarian-friendly version. I tried this once with sautéed eggplant added in too, and it made the rolls surprisingly hearty without losing any crispiness!
- Spice it Up: If you like heat, add a dash more Gochujang to the dipping sauce or toss some finely diced fresh chili into the filling. My family loves a little kick, so I usually add a small sliced Thai bird chili to the mix for extra zing.
- Air Fryer Friendly: Air frying is a fantastic lighter alternative. Though they won’t be quite as crispy as deep-fried, the convenience and cleaner kitchen are huge pluses on busy nights. Just be sure to keep an eye on them so they don’t dry out.
- Seasonal Twist: Try incorporating whatever fresh veggies you have on hand—julienned bell peppers or snow peas add a fun crunch and color contrast to the classic cabbage and carrot mix.
Step-by-Step: How I Make Crispy Chicken Spring Rolls Recipe

Step 1: Prep Your Veggies Nicely
Start by getting all your vegetables ready. Mince the garlic and shallot, slice the green onions thinly, shred the cabbage, grate the carrot, chop cilantro, and finely chop those shiitake mushrooms. Having everything prepped upfront makes the cooking flow so much easier—trust me, scrambling last minute just isn’t fun when wrappers wait on the counter!
Step 2: Cook Mushrooms and Aromatics Until Fragrant and Tender
In a large skillet over medium-high heat, warm up 2 tablespoons of avocado oil and 1 tablespoon toasted sesame oil. Add minced garlic, shallots, green onions, and chopped shiitake mushrooms. Stir frequently as the mushrooms soften and brown lightly. This takes about 8 minutes—you’ll notice the kitchen fills with a savory, heavenly aroma as they cook down.
Step 3: Add and Cook Ground Chicken
Crumble in the ground chicken, breaking it small as it cooks through. When the pink disappears and the chicken is cooked, stir in 2 tablespoons oyster sauce and 1 teaspoon sea salt. Let it cook just 2 more minutes so the flavors meld perfectly, then remove from heat and let cool to room temperature.
Step 4: Soften and Prepare Rice Vermicelli Noodles
Place the rice vermicelli noodles in a large bowl and cover them with boiling water. After 3 minutes, drain thoroughly and roughly cut the noodles in half with scissors. Breaking up the noodles is key—it makes them blend beautifully into the filling without annoying clumps.
Step 5: Make the Flavor-Packed Filling
Combine shredded cabbage, grated carrot, chopped cilantro, the cooled chicken and mushroom mixture, and the prepared noodles in a big bowl. Mix everything really well, gently separating noodles and ensuring the filling is nicely distributed. This filling is where all that delicious savory, sweet, and fresh goodness comes together.
Step 6: Whisk the Egg Wash
Crack a large egg into a small bowl and whisk until the yolk and whites are fully blended. This egg wash will act like edible glue to seal your spring rolls tight and prevent any filling from creeping out during cooking.
Step 7: Prepare and Keep Wrappers Moist
Open your package of square flour-based spring roll wrappers and keep them covered with damp paper towels. This step is crucial to prevent drying out and tearing. When you’re ready, gently peel one wrapper from the stack and lay it on your work surface in a diamond position to start rolling.
Step 8: Assemble Each Spring Roll
If you love basil’s aromatic lift, place 1 to 2 basil or Thai basil leaves across the bottom third of the wrapper. Scoop a small mound of filling right on top. Brush egg wash along all wrapper edges. Fold the bottom corner snugly over the filling, then tuck in the left and right sides like envelope flaps. Roll upwards tightly to seal, finishing by pressing the top corner firmly with egg wash. Perfectly rolled spring rolls are neat, packed, and ready for frying or air frying.
Step 9: Fry Until Golden and Crispy
Heat 4 cups of peanut oil in a deep pot to 350°F (177°C), making sure you leave enough space to avoid any overflow. Fry 2 to 4 spring rolls at a time, cooking for 4 to 5 minutes or until beautifully golden and crispy. Drain them on a wire rack to keep that crunch, then repeat until all rolls are done. For safety and ease, I love using a small electric fryer like the Fry Daddy—it’s a game-changer for home frying!
Step 10: Air Fryer Option for a Lighter Crunch
Preheat your air fryer to 390°F (198°C). Lightly spray the basket with cooking spray, arrange the spring rolls in a single layer, and air fry for 10 to 15 minutes until crispy and heated through. Flip them halfway if your air fryer requires it for even browning. While not quite the same crunch as frying, this method still delivers satisfying texture and flavor with less oil.
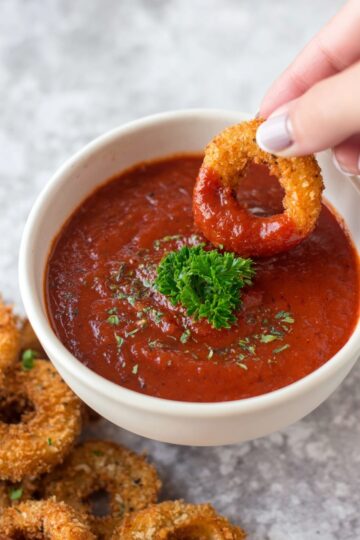
Step 11: Whip Up the Sweet and Spicy Dipping Sauce
In a small bowl, mix 6 tablespoons honey, 1 tablespoon oyster sauce, 1 teaspoon Chinese mustard, 1 teaspoon Gochujang, and 1 teaspoon rice wine vinegar. Stir well until smooth. This sauce balances sweetness, tang, and a hint of heat—making it absolutely irresistible when dunked with each crispy bite.
Top Tip
These tips come straight from lots of kitchen experiments and happy taste tests to ensure your Crispy Chicken Spring Rolls Recipe turns out perfectly every time.
- Wrapper Care: Always keep your spring roll wrappers covered with a damp paper towel while assembling. This prevents them from drying out and tearing, which can be frustrating when rolling.
- Even Filling Distribution: Take the time to separate the rice vermicelli noodles in the filling. They tend to clump but pulling them apart ensures every bite has great texture and flavor.
- Oil Temperature Control: Maintain your frying oil at a steady 350°F (177°C). Too hot will burn the wrappers before the filling cooks; too cool and the rolls will absorb oil and become greasy instead of crispy.
- Rolling Technique: Use the snug rolling method—fold corners tightly like an envelope. This keeps the filling secure and results in a compact, crispy spring roll without bursting.
How to Serve Crispy Chicken Spring Rolls Recipe

Garnishes
Fresh herbs like Thai basil or cilantro add a lovely aromatic lift when served alongside these spring rolls. Sprinkle some toasted sesame seeds or chopped green onions on top of the dipping sauce for an inviting presentation. For a little extra zing, a handful of pickled carrots or daikon radish on the side works beautifully.
Side Dishes
Pair your crispy spring rolls with a simple Asian cucumber salad for crunch and freshness or steamed jasmine rice for a more filling meal. A bowl of hot miso soup or a light noodle salad with sesame dressing complements the appetizer nicely, rounding out your meal with harmonious flavors and textures.
Make Ahead and Storage
Storing Leftovers
Store any leftover cooked spring rolls in an airtight container in the refrigerator for up to 2 days. To keep their crispiness, it's best to reheat them in the oven or air fryer rather than the microwave.
Freezing
If you'd like to save some for later, freeze cooked spring rolls by placing them spread out on a parchment-lined baking sheet until frozen solid, about 1 to 2 hours. Then transfer to freezer bags or containers and store for up to 3 months.
Reheating
To reheat frozen spring rolls, preheat your oven to 375°F and bake for 15 to 20 minutes until heated through and crispy. Alternatively, air fry at 375°F for 6 to 12 minutes, turning halfway if possible, for a quicker and evenly crisp finish.
Frequently Asked Questions:
Absolutely! You can prepare the filling up to 2 days in advance and store it in an airtight container in the fridge. Just make sure it cools completely before storing.
For the crispiest results, use square flour-based spring roll or lumpia wrappers. Avoid round rice paper wrappers, as they won’t crisp up the same way and can be fragile to work with.
While frying yields the crispiest texture, you can air fry the spring rolls at 390°F for 10 to 15 minutes for a lighter version. Baking may produce a less crispy exterior.
Make sure to roll them snugly using the egg wash to seal the edges tightly. Also, avoid overcrowding the frying oil, and keep the temperature steady at 350°F to ensure even cooking without bursting.
Final Thoughts
Making homemade Crispy Chicken Spring Rolls is such a rewarding experience — you get to enjoy the wonderful blend of savory filling wrapped in perfectly golden, crispy shells. Whether you fry them up for a special occasion or air fry for an everyday snack, they’re irresistibly delicious and sure to bring smiles. So next time you’re craving a crunchy, flavorful treat, give this recipe a try and savor every bite!
Print
Crispy Chicken Spring Rolls Recipe
- Prep Time: 45 minutes
- Cook Time: 15 minutes
- Total Time: 1 hour
- Yield: 20 spring rolls 1x
- Category: Appetizer
- Method: Frying
- Cuisine: Asian
Description
These Crispy Spring Rolls feature a flavorful filling of ground chicken, shiitake mushrooms, and fresh vegetables wrapped in thin, crispy flour-based wrappers. They are perfectly golden and crunchy when fried but can also be air-fried for a lighter option. Served with a sweet, tangy, and spicy dipping sauce, they are a delicious appetizer or snack that’s hard to eat just one of.
Ingredients
Spring Rolls
- 2 tablespoons avocado oil
- 1 tablespoon toasted sesame oil
- 5 cloves garlic, minced
- 1 medium shallot, minced
- 2 green onions, sliced thin
- 6 ounces shiitake mushrooms, stems removed and finely chopped (about 2 cups)
- 1 cup finely shredded cabbage
- ½ cup grated carrot
- ½ cup chopped cilantro
- 1 pound ground chicken
- 2 tablespoons oyster sauce
- 1 teaspoon fine sea salt
- 2 ounces thin rice vermicelli noodles
- 1 large egg (for egg wash)
- 1 (12oz) package square flour-based spring roll wrappers (lumpia wrappers)
- Basil or Thai basil leaves (optional)
- 4 cups peanut oil (for frying)
Spring Roll Sauce
- 6 tablespoons honey
- 1 tablespoon oyster sauce
- 1 teaspoon Chinese mustard
- 1 teaspoon Gochujang (Korean fermented chili paste)
- 1 teaspoon rice wine vinegar
Instructions
- Prepare Vegetables: Mince garlic, shallot, and slice green onions thinly. Shred cabbage, grate carrot, chop cilantro, and finely chop shiitake mushrooms. Have all ingredients ready for cooking.
- Cook Mushrooms and Aromatics: Heat 2 tablespoons avocado oil and 1 tablespoon toasted sesame oil in a large skillet over medium-high heat. Add garlic, shallot, green onion, and chopped shiitake mushrooms. Cook, stirring often, until mushrooms reduce in size and brown, about 8 minutes.
- Cook Ground Chicken: Add ground chicken to the skillet, breaking it into small crumbles. Cook until no longer pink and cooked through. Stir in 2 tablespoons oyster sauce and 1 teaspoon salt; cook for 2 more minutes. Remove from heat and let cool to room temperature.
- Prepare Noodles: Place thin rice vermicelli noodles in a large bowl and cover with boiling water. Let stand for 3 minutes, then drain. Cut the noodles roughly in half to ease mixing.
- Make Filling: In a large bowl, combine cabbage, carrot, cilantro, noodles, and cooled chicken and mushroom mixture. Mix thoroughly, separating noodles to distribute evenly.
- Make Egg Wash: Crack the egg into a small bowl and whisk until well blended. Set aside.
- Prepare Wrappers: Remove spring roll wrappers from packaging and cover with damp paper towels to prevent drying.
- Assemble Spring Rolls: Place one wrapper on work surface with a corner pointing toward you (diamond shape). Optionally place 1-2 basil leaves on the bottom third. Spoon a small mound of filling onto the bottom third. Brush egg wash along all four edges of the wrapper. Fold the bottom corner over the filling snugly; fold left and right sides inward; roll upwards tightly. Seal the top corner with egg wash.
- Repeat Rolling: Place finished spring rolls on a tray covered with damp towels to prevent drying while assembling remaining rolls.
- Fry Spring Rolls: Heat peanut oil in a deep pot to 350°F (177°C), leaving room to prevent overflow. Fry 2-4 spring rolls at a time until golden brown, about 4 to 5 minutes. Drain on wire rack. Repeat until all are fried.
- Air Fry Option: Preheat air fryer to 390°F (198°C). Lightly spray basket with cooking spray and arrange spring rolls. Air fry for 10 to 15 minutes until crispy, turning if needed.
- Make Dipping Sauce: In a small bowl, stir together honey, oyster sauce, Chinese mustard, Gochujang, and rice wine vinegar until combined. Serve alongside spring rolls.
Notes
- Use square flour-based spring roll or lumpia wrappers for best crispiness; avoid round rice paper wrappers.
- Thin rice vermicelli noodles work best; break them up to prevent clumping.
- Make filling up to 2 days ahead and store in an airtight container in the refrigerator.
- Freeze cooked spring rolls by placing them spread out on parchment paper until frozen hard, then transfer to bags; freeze up to 3 months.
- Reheat frozen spring rolls in a 375°F oven for 15-20 minutes or air fry at 375°F for 6-12 minutes.
- When working with wrappers, keep them covered with a damp towel to prevent drying and tearing.
- For frying, a small electric fryer like a Fry Daddy is convenient and safe.
Nutrition
- Serving Size: 1 spring roll
- Calories: 130 kcal
- Sugar: 3 g
- Sodium: 250 mg
- Fat: 5 g
- Saturated Fat: 1 g
- Unsaturated Fat: 4 g
- Trans Fat: 0 g
- Carbohydrates: 12 g
- Fiber: 1 g
- Protein: 8 g
- Cholesterol: 35 mg

Leave a Reply